Interface Guide
Use the StaticX dashboard to create sites, manage deployments and forms, organize workspaces, issue scoped tokens, review alerts, and hand a project to an agent.
Visual workflow
Set up StaticX from the dashboard.
The dashboard is organized around sites, deployments, forms, workspaces, settings, notifications, and project-level agent setup. Start visually, then hand the same project contract to an API client or agent when you want automation.
01
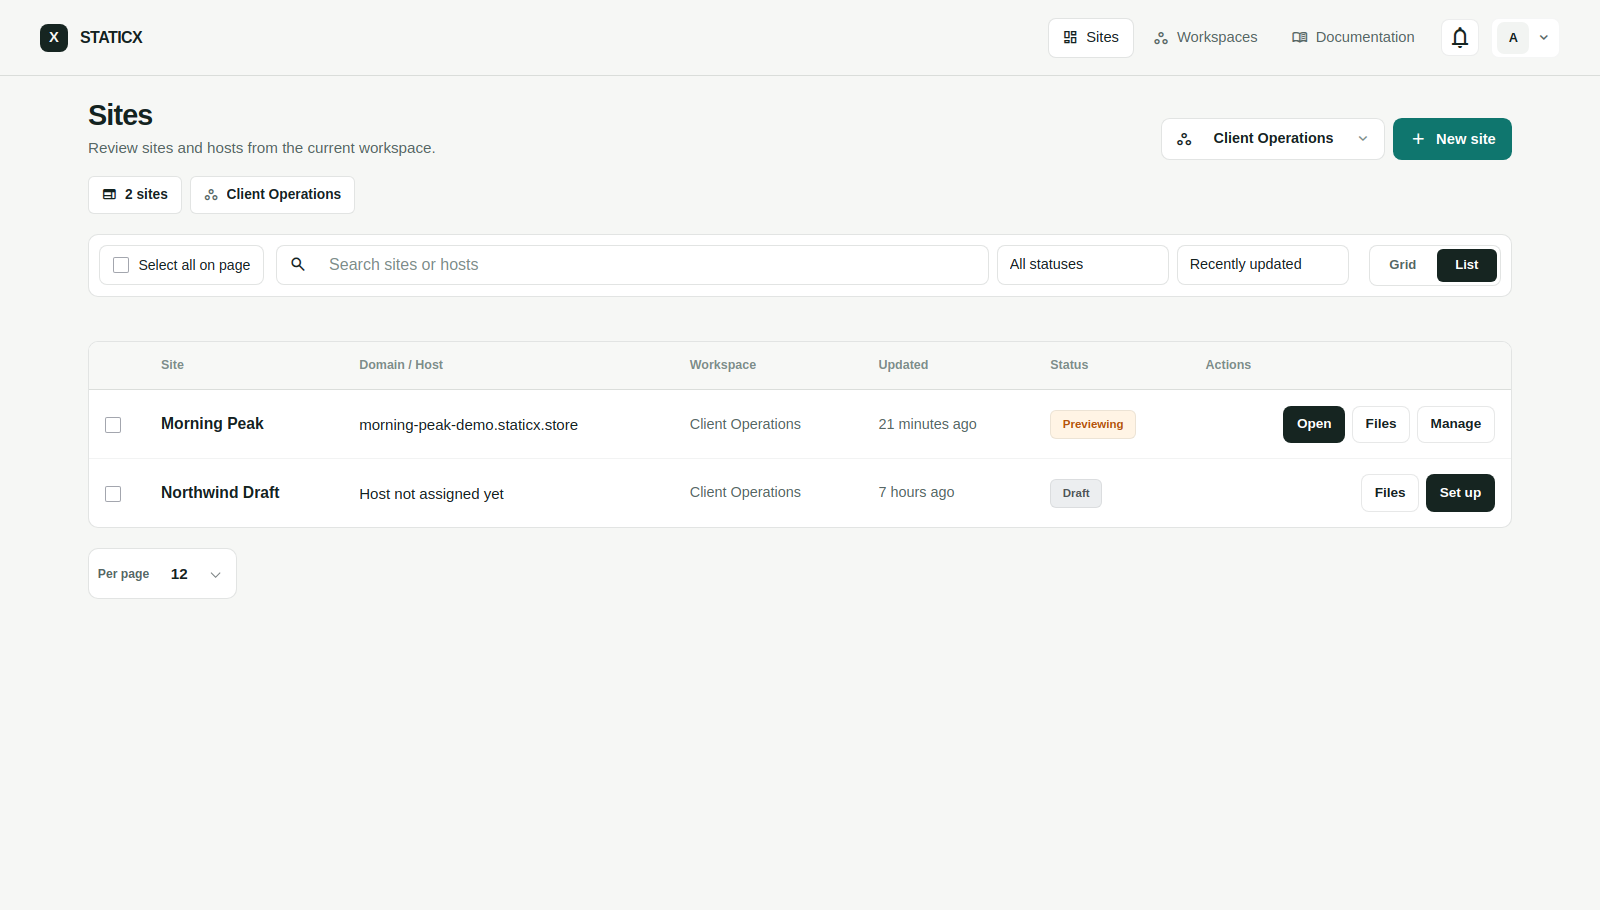
Open Sites.
The Sites page shows the current workspace, filters, list or grid views, bulk actions, and the New site action. Use the workspace switcher to focus on one team, client, or account.
- Use New site to create a project.
- Use Grid/List to switch between visual and dense views.
- Filter by search, status, and sort order before bulk actions.
02
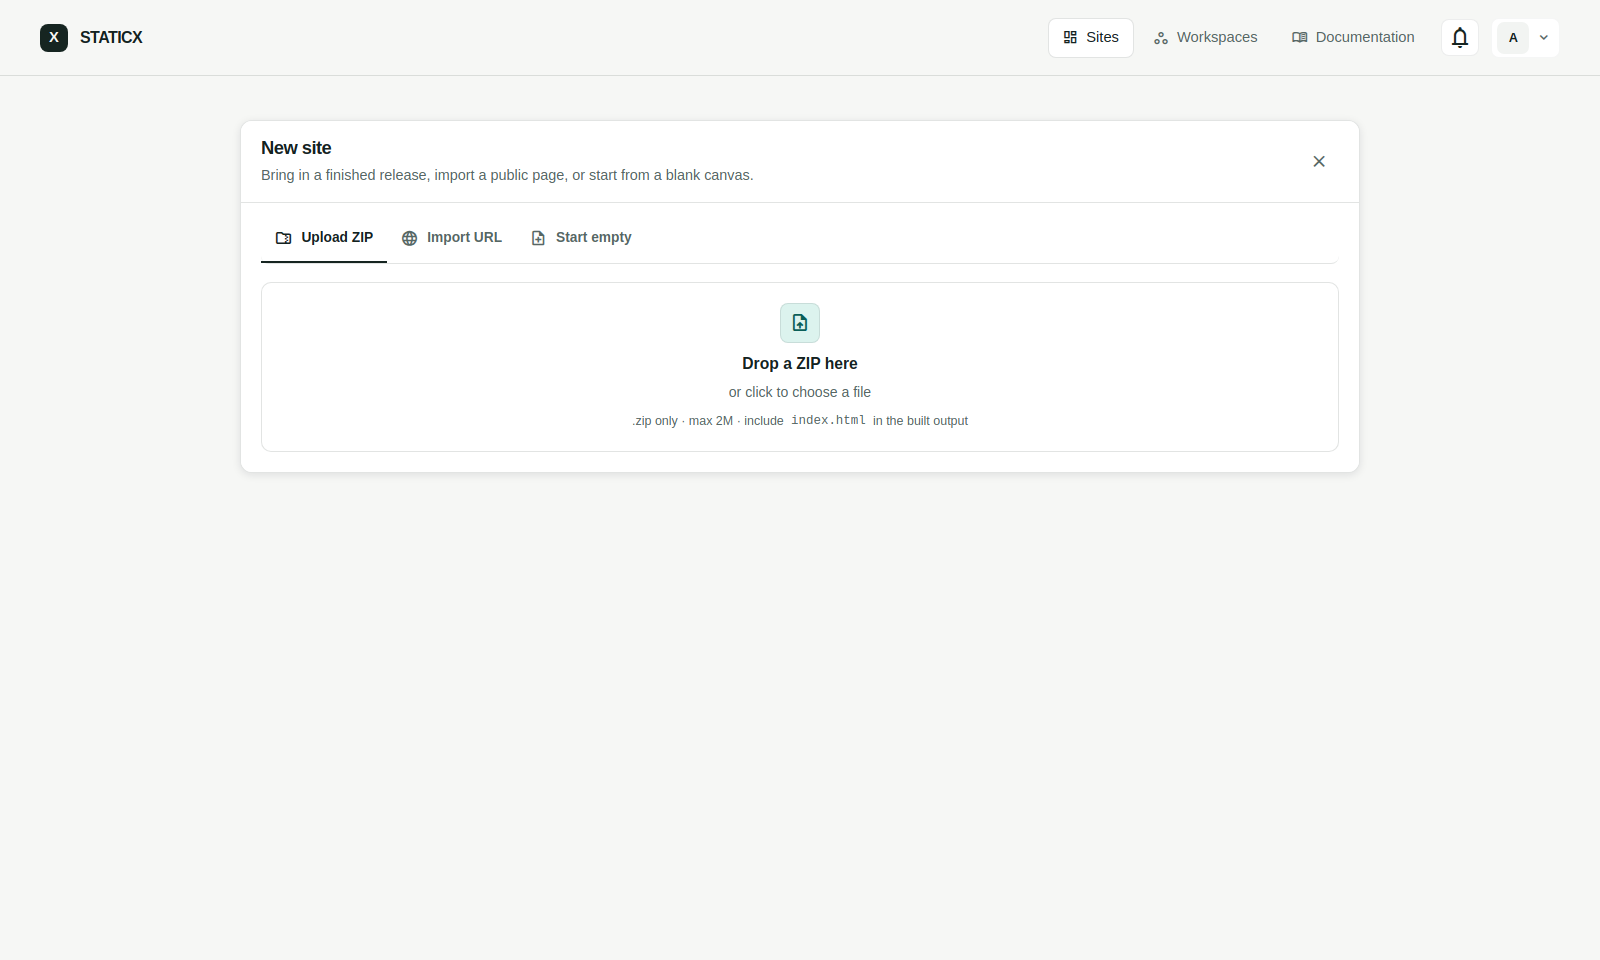
Create a site.
The New site flow has three simple paths. Upload ZIP is for a finished static build. Import URL copies an existing public page. Start empty creates the shell first so you can upload or automate the first release later.
- Upload ZIP: archive root should contain
index.html. - Import URL: use a public URL that the platform can reach.
- Start empty: create first, then upload or edit files later.
03
Publish, roll back, or delete old deployments.
Each successful publish creates a rollback-ready release unless deployment history is turned off. The Deployments tab shows the active release, rollback targets, file counts, storage size, and the single baseline release when history is disabled.
- Active deployments stay protected from deletion.
- Rollback switches the active deployment pointer instead of copying files.
- History off keeps one baseline release active for analytics and forms without adding more versions.
- Delete selected removes inactive deployment records and releases unused blobs when you intentionally clean old versions.
04
Review static form entries.
The Forms tab lists the collections detected from deployed HTML. Open a collection to review entries, update rows, import or export CSV, and bulk delete submissions when a list is cleaned up.
- Add
data-staticx-formto a normal HTML form. - Upload or deploy the site so StaticX scans the page.
- Open the Forms tab to review submissions in the site workspace.
05
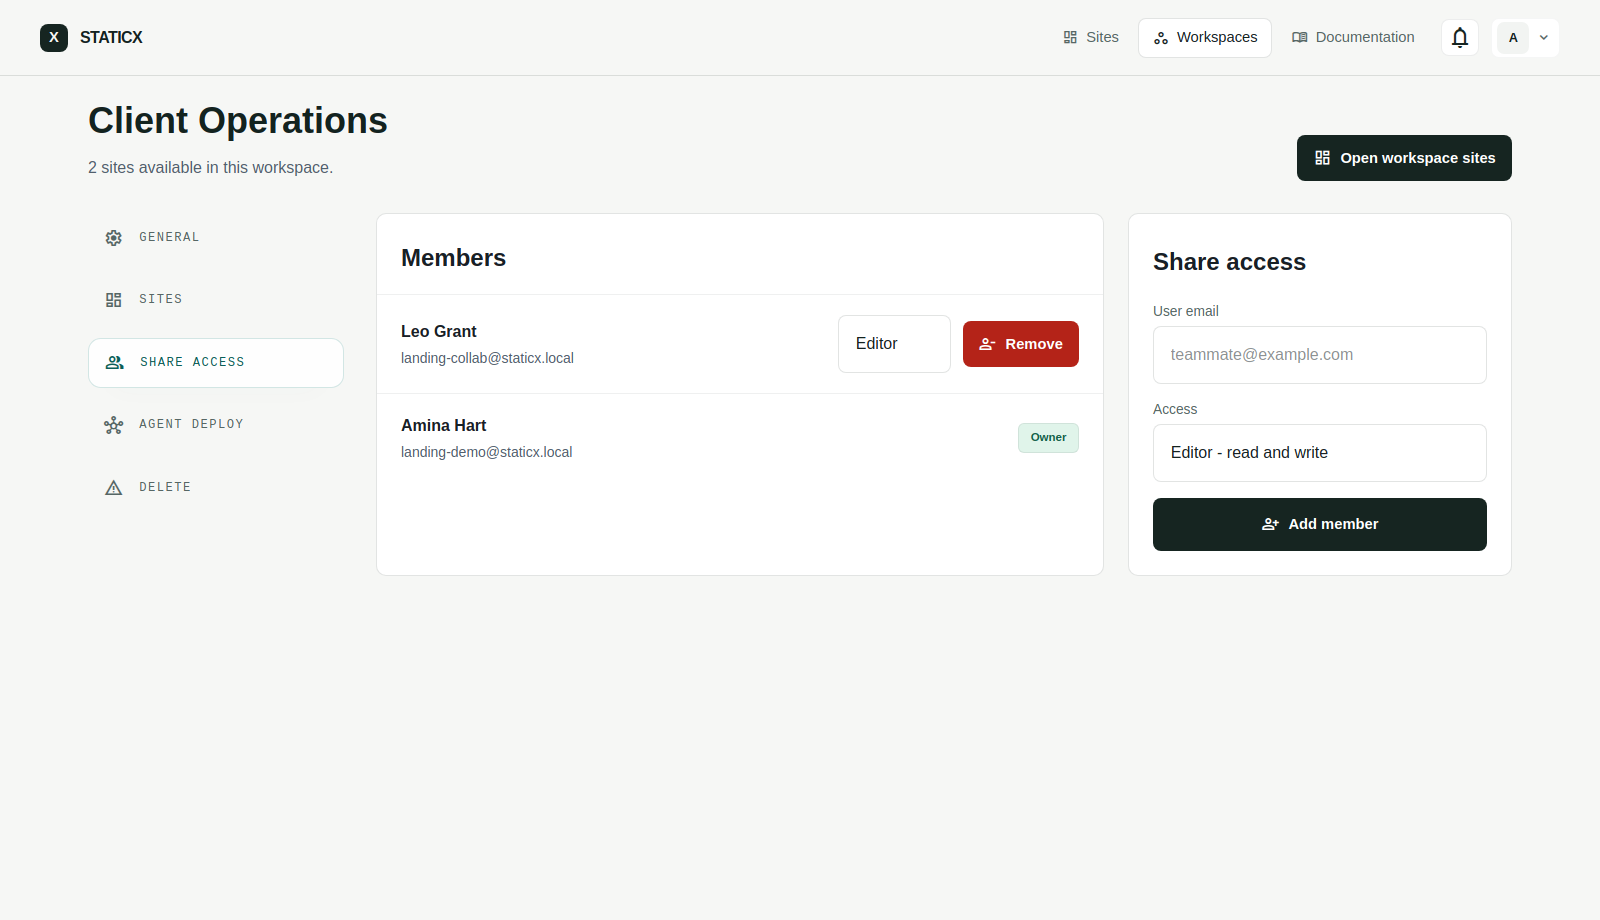
Manage one workspace at a time.
Workspaces keep sites separated by team, client, or account. The workspace page gives each team a clear operating record for members, share access, sites, and workspace-level automation tabs.
- The default Personal Workspace receives new sites automatically.
- Use Share access to invite collaborators or update their role.
- Move into the Sites or Agent deploy tabs when one workspace needs project inventory or automation setup.
06
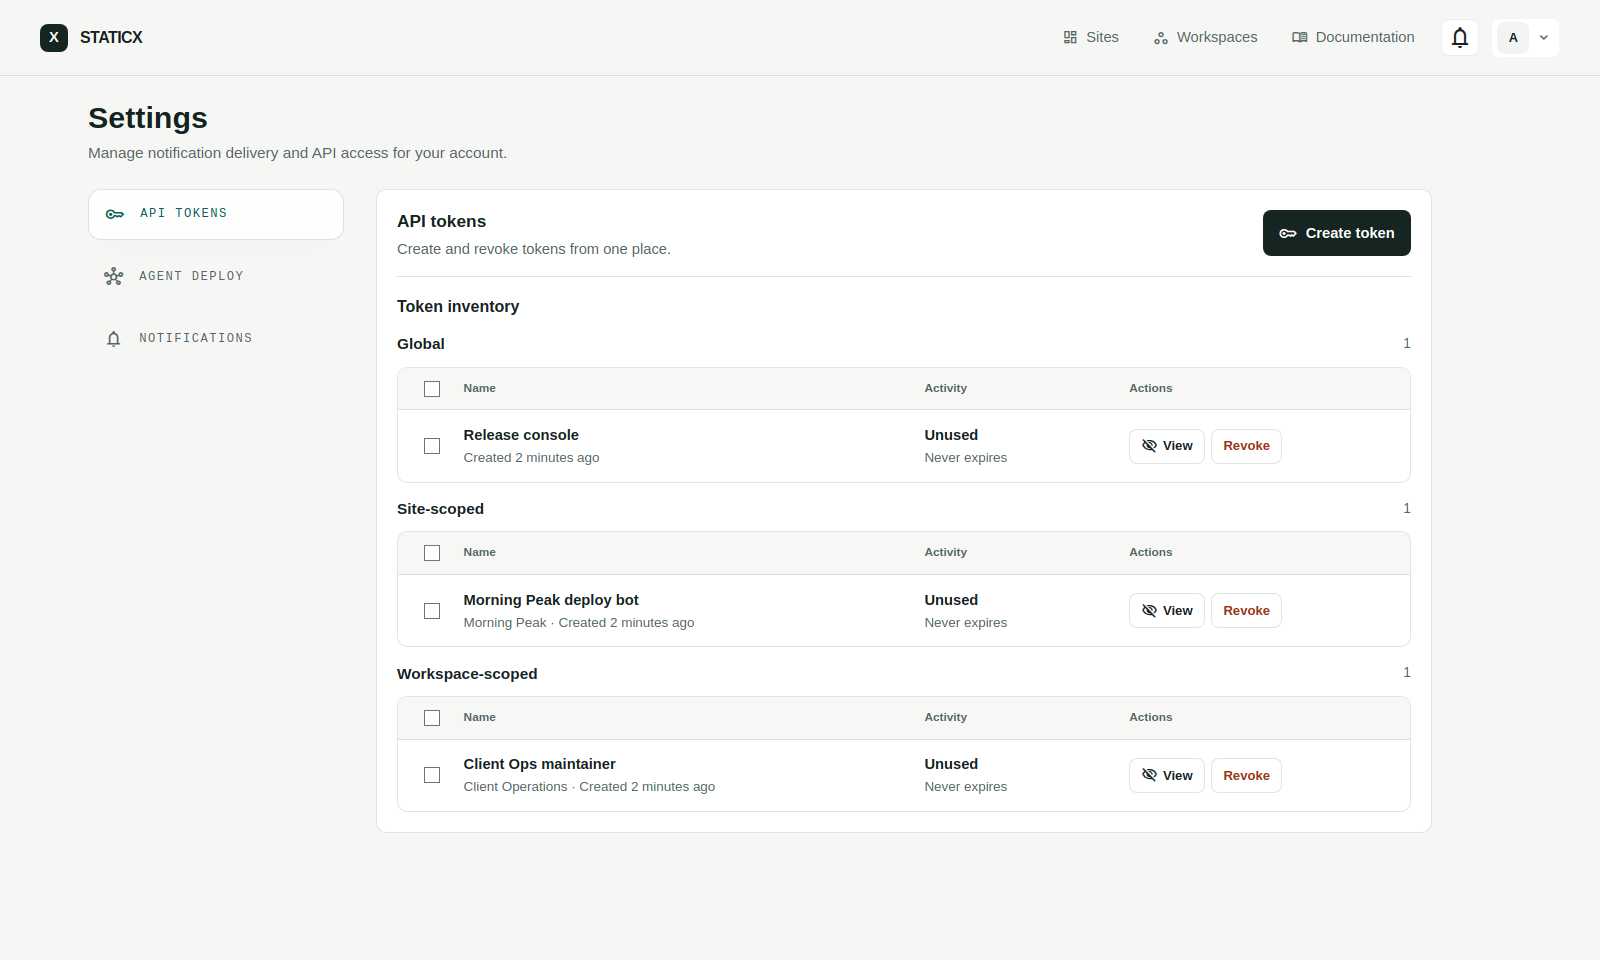
Create personal and scoped tokens.
API tokens live in Settings, and scoped automation tokens live where the work happens. Use Settings for your global inventory, then create site or workspace tokens from those pages when you want safer automation.
- Use Global tokens for broad account tooling.
- Use Site tokens for one site and one deployment runner.
- Use Workspace tokens for multi-site automation inside one workspace.
- Copy the token immediately after creation.
- Prefer short expiries for external agents and CI jobs.
07
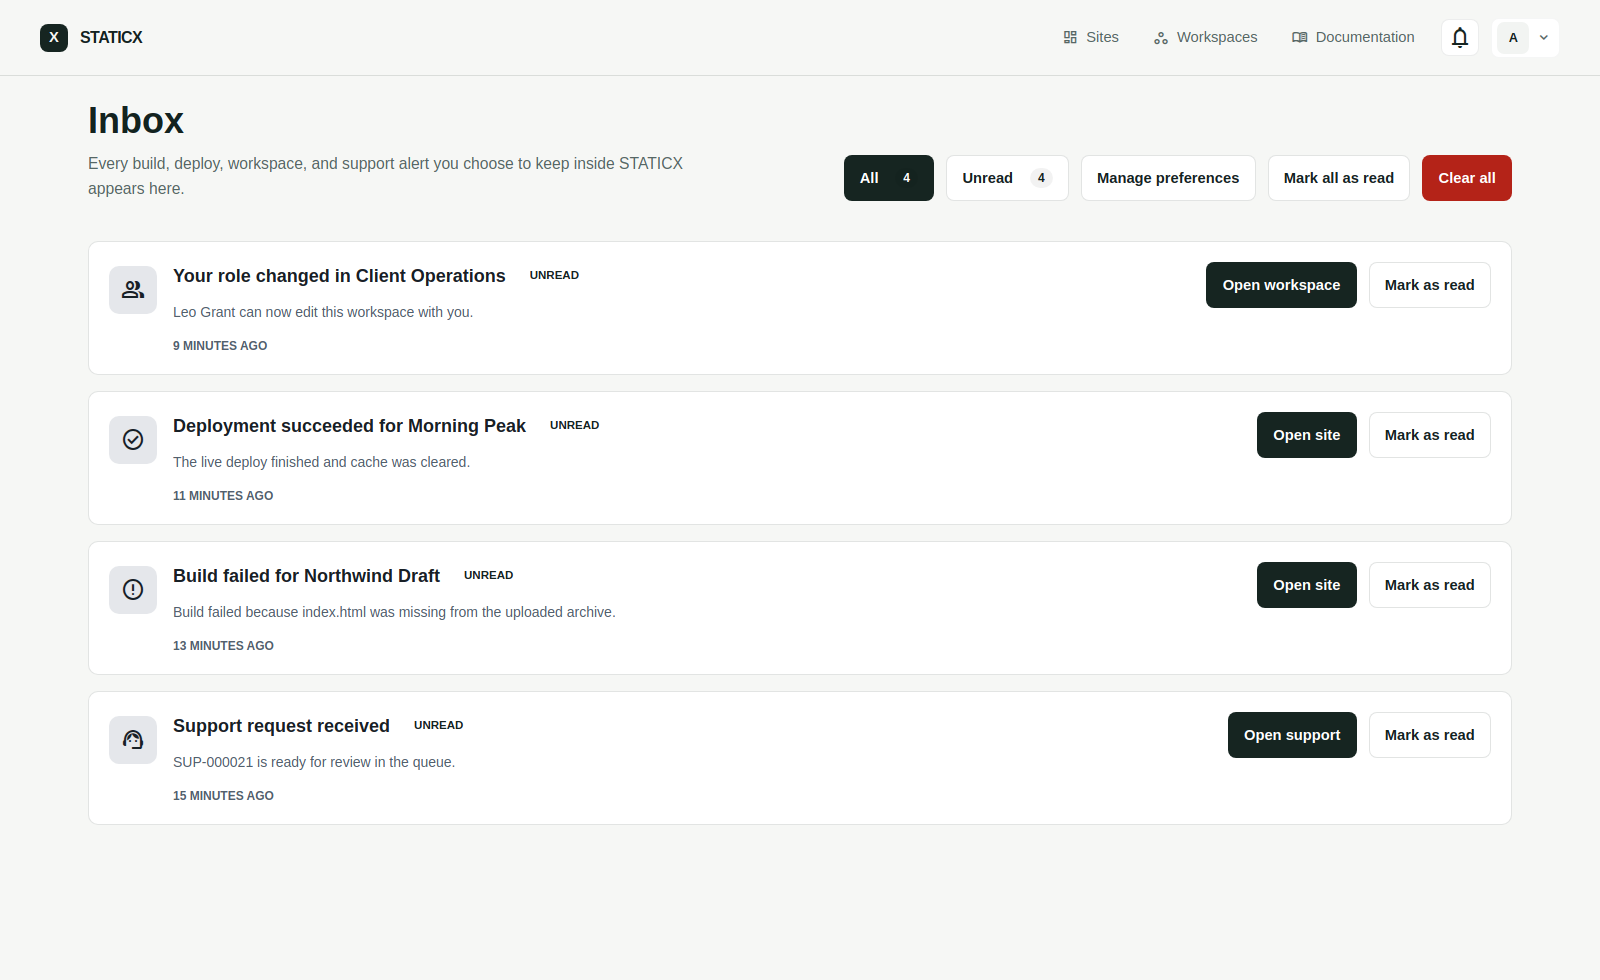
Review alerts and delivery preferences.
The inbox shows deployment, workspace, and support activity. Open Settings when you want to decide which alerts stay in-app and which ones also go to email.
- Unread items stay highlighted until you mark them as read.
- Use Manage preferences to control per-event delivery.
- Build and deploy failures are the best candidates for email delivery.
08
Choose the public address for a site.
The Domain tab keeps the generated subdomain and the custom domain flow separate. If the account has an active publishing domain, the free subdomain field includes a domain selector so a site can use either the StaticX default suffix or a connected publishing domain.
- Use Free subdomain for managed addresses like
launch.staticx.storeorlaunch.example.com. - Use Custom domain when the whole host should be a customer-owned exact domain such as
www.example.com. - Saving a generated subdomain changes the real live host for that site and keeps uniqueness scoped to the selected domain suffix.
09
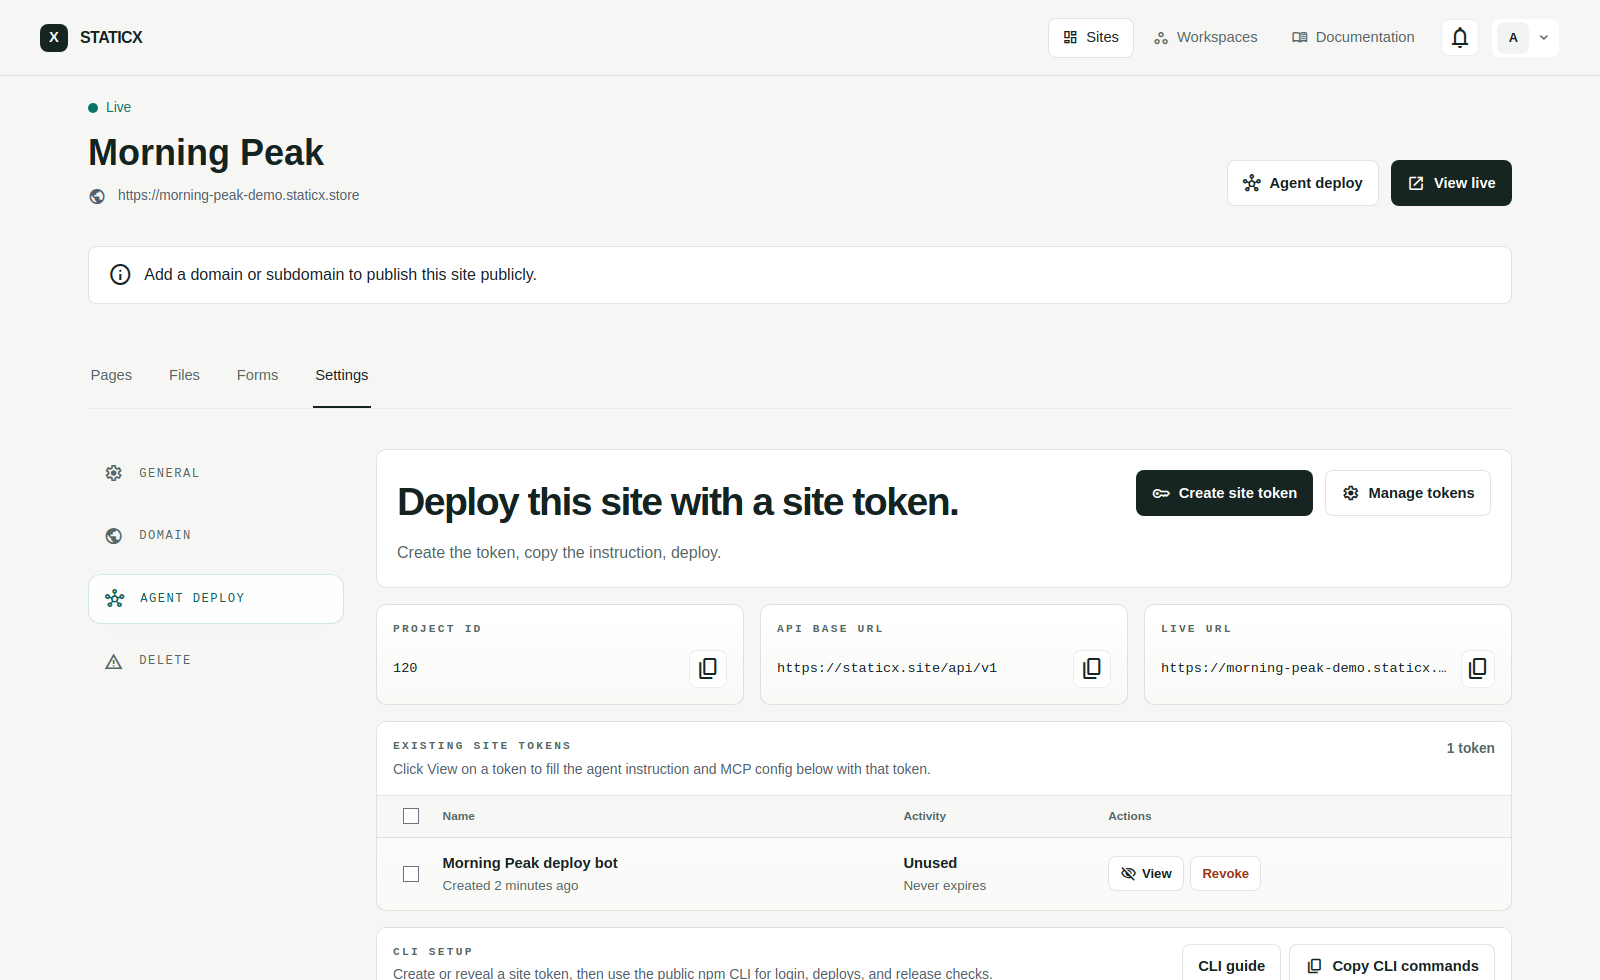
Prepare agent deployment.
Open a project, go to Settings, then Agent deploy. This page gives the project ID, API base URL, live URL, a copyable agent instruction, a copyable MCP client config, and a site-scoped token flow.
- Click Create site token from the project agent page.
- Copy the filled instruction when the token is shown.
- Use the MCP config when the agent supports tool servers.